

We are familiar with several APIs and may have noticed that each API have their own authentication method like
JSON Web Tokens (JWT)
OAuth 2.0
Basic Authentication
Bearer Token Authentication
API Keys
Session-Based Authentication
These authentication methods offer varying levels of security and complexity, and the choice depends on factors like the application's requirements, security considerations, and user experience.
In this article we going to implement JWT authentication in our graphql API, For the database, we will use MongoDB and Apollo Server for the graphql server.
Understanding JWT
JWT is a widely used method for authentication. It involves the generation of a token that contains encoded user information and is passed between the client and server for subsequent requests.
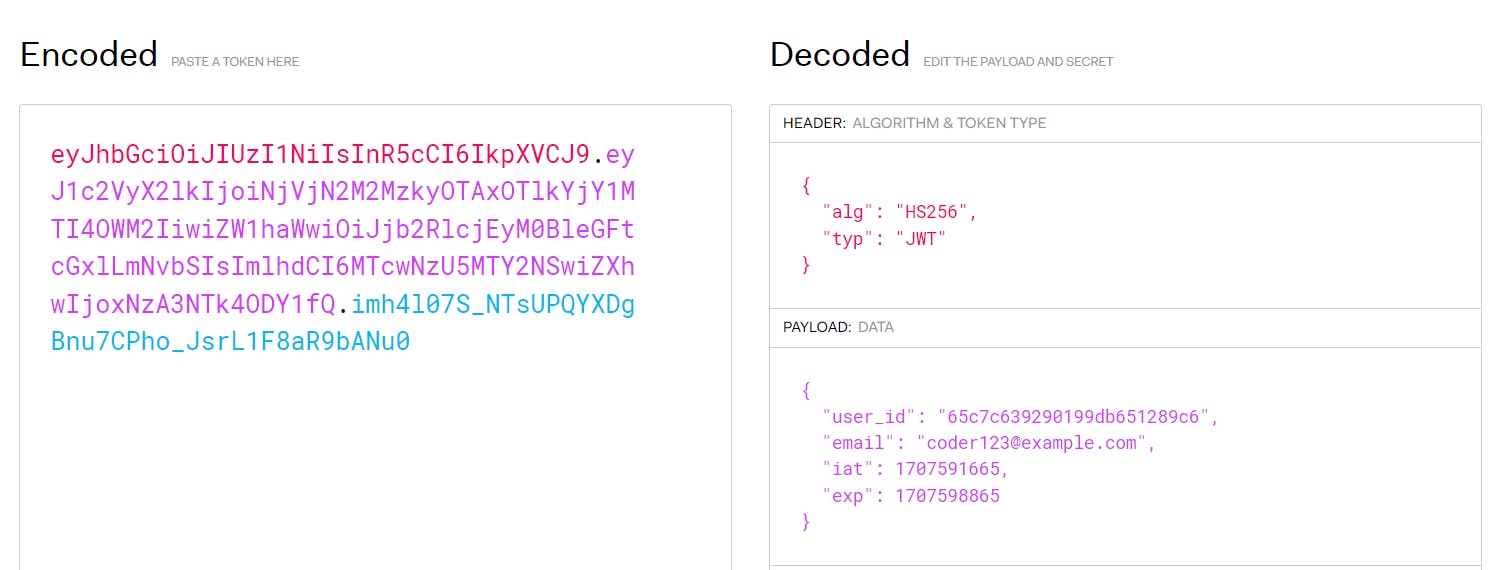
JSON Web Tokens (JWT) have three main components: header, payload, and signature. Here's a brief explanation of each:
Header: The header typically consists of two parts: the token type ("typ") and the hashing algorithm used to create the signature ("alg").
Payload: The payload contains the claims, which are statements about the entity (typically the user) and additional data.
Signature: The signature is created by combining the encoded header, encoded payload, and a secret key.
JSON Web Tokens (JWT) offer several benefits, making them a popular choice for authentication and information exchange in web applications:
Stateless Authentication: JWTs are stateless, meaning the server does not need to store session data. This reduces server overhead and makes JWTs ideal for scaling applications.
Enhanced Security: JWTs can be digitally signed and optionally encrypted, ensuring data integrity and confidentiality during transmission.
Compact and Efficient: JWTs are compact and can be easily transmitted over HTTP headers or as URL parameters. This reduces network overhead and improves performance, especially in microservices architectures where multiple services communicate frequently.
Cross-Domain Compatibility: JWTs can be used across different domains and platforms.
Customizable Payload: JWT payloads can contain custom claims and metadata, providing flexibility in defining user roles, permissions, and additional information.
Scalability: Since servers do not need to maintain a session state, new instances can be added to handle increased load without affecting existing users' sessions.
Setting Up Apollo GraphQL Server
Here is the GitHub link https://github.com/icon-gaurav/mastering-graphql-with-nodejs/tree/jwt-authentication
You can clone this and follow along with my explanation.
Implementing JWT Authentication
We will be making simple authentication where the user has an email, username and password and uses email and password for authenticating the user and generating a JWT token corresponding to the user. Later on, we use this JWT token to authenticate our API.
Let's do the implementation step-by-step
Install JWT packages
We will use bcrypt library to encrypt our password and then compare the hashed password with the password provided by the user in the login process
npm install --save bcrypt jsonwebtoken
Update User schema
We already know how to define the user schema and sync that schema with MongoDB. If you want to go through that again here is the link to the article [Graphql API with MongoDB]
// mongodb schema for user object
const userSchema =  new Schema({
    username:String,
    email:String,
    password:String
});

// defining user model
const User = mongoose.model("User", userSchema);
Register User
Register user mutation creates a new user into the database, it converts the plain text password into the hashed string using bcrypt.
// register user mutation
registerUser: async (_parent: any, args: any) => {
            const {email, password, username} = args;
            // we are storing hashed password to the database
            const newUser = new User(
                {
                    email,
                    password: bcrypt.hashSync(password, bcrypt.genSaltSync(10)),
                    username: username ?? email
                })
            return await newUser.save();
        }
Generate JWT token
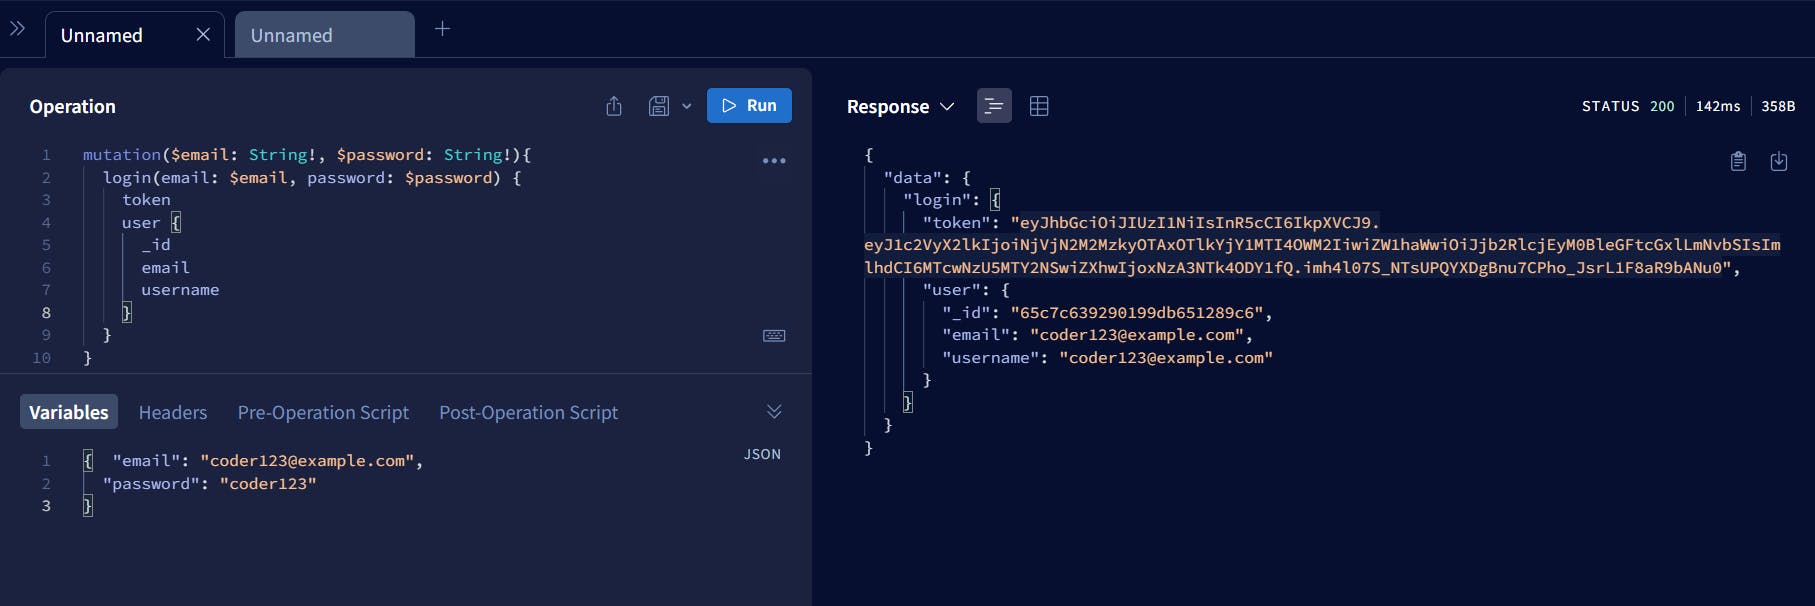
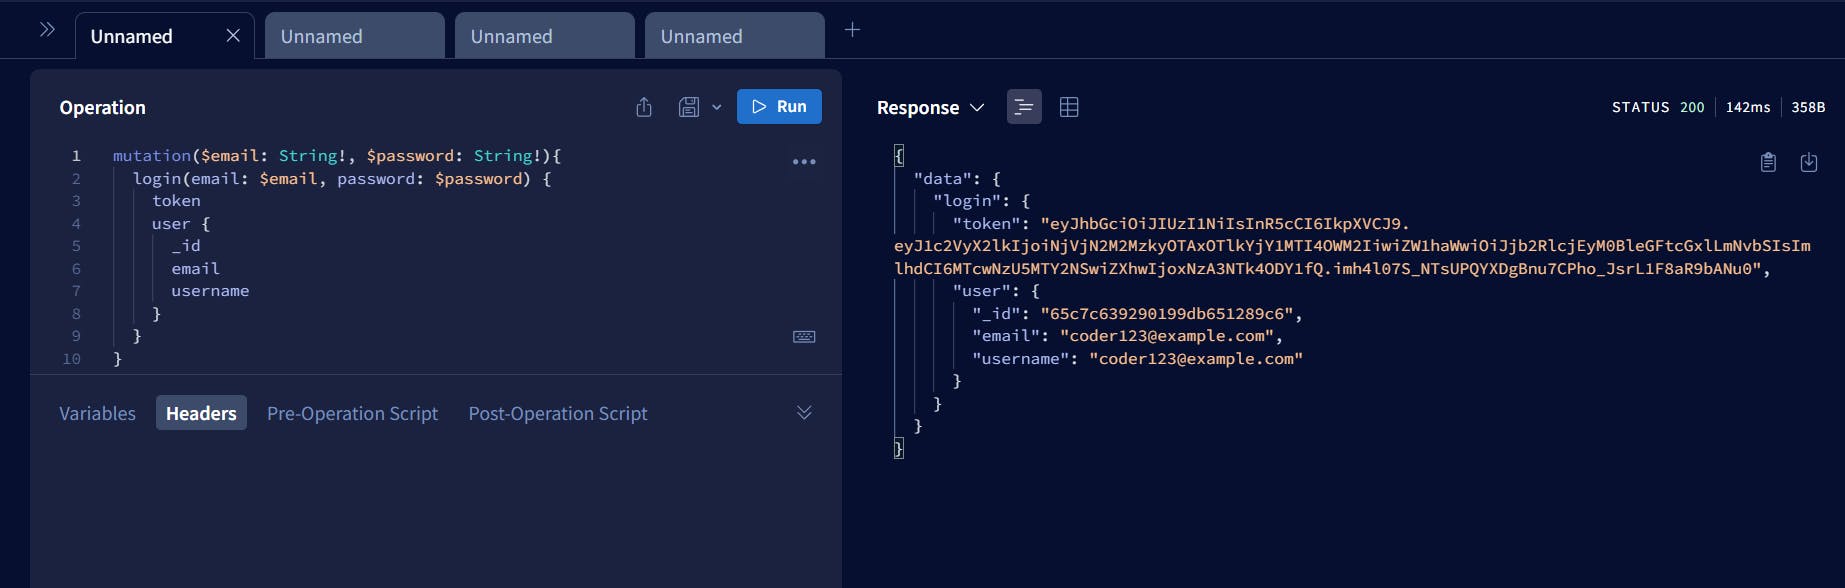
Implement a login mutation that will generate a jwt for the user based on credentials provided by the user
// login mutation
login: async (_parent: any, args: any, _context: any) => {
            const {email, password} = args;
            const requestedUser = await User.findOne({email: email});
            /*
                we are using bcrypt to compare 2 passwords as we stored hashed password and not the plain text
                for security reasons
            */
            if (requestedUser && bcrypt.compareSync(password, requestedUser?.password as string)) {
                // user has provided correct email and password
                // generate the signed jwt token
                const token = jwt.sign(requestedUser, "myprivatekey", {expiresIn: '2h'})

                // return the auth payload
                return {
                    token,
                    user: requestedUser
                }
            }else{
                return new Error('Email or password is incorrect!')
            }
        }
We have a JWT token as a response for login mutation. We can use this JWT token to authenticate the API without providing the email and password again and again.
Verifying JWT token on jwt.io
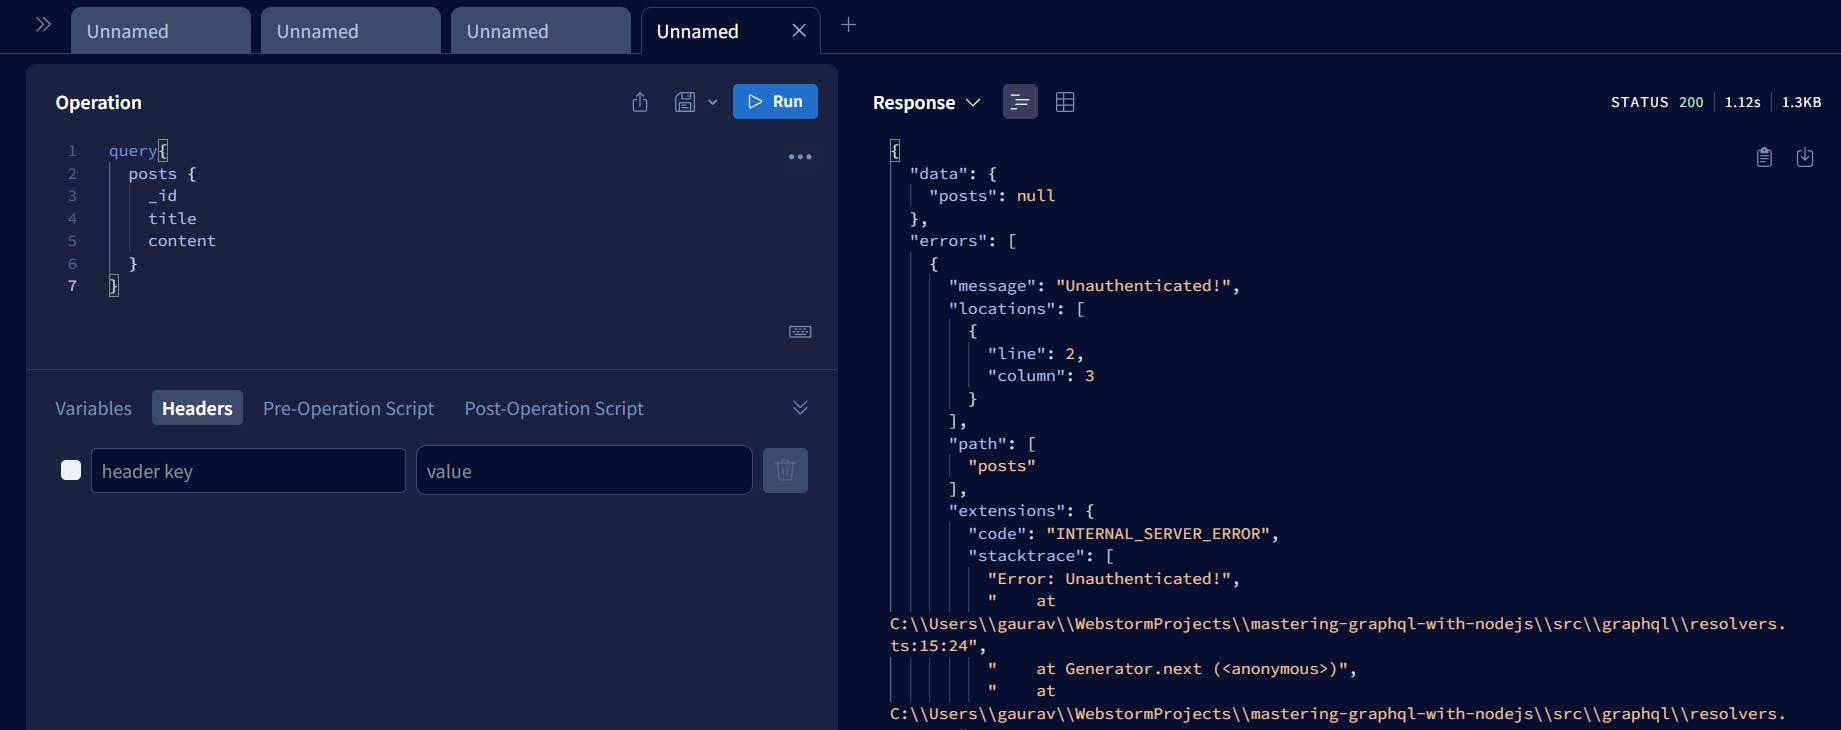
Securing Resolver with JWT
We will secure our resolver by making a checkpoint that will check if we have user information in the resolver or not. If yes then we are authenticated, if not then we throw an error for Authentication
// securing user related post resolver
posts: async (_parent: any, _args: any, context: any) => {
            // fetch the user from the context
            const {user} = context;
            if (user) {
                return Post.find();
            } else {
                return new Error("Unauthenticated!")
            }
        },
Since we are checking the user information in the resolver we have to pass it somehow. So we will use context to pass the user to all resolvers and a JWT middleware which will verify if our JWT token is valid.
JWT middleware
The main function of this middleware is to check whether the jwt is valid or not. If JWT is valid return the payload otherwise return null
// jwt validation check middleware
const jwtValidationMiddleware = (token: string) => {
    if (token) {
        return jwt.verify(token?.split(' ')?.[1], "myprivatekey")
    }
}
Now we have the JWT payload our next step is to pass user information to the resolvers.
Context update
We will pass the JWT payload information i.e. user information to all the resolvers to check for the user's authentication
// context code
startStandaloneServer(server, {
    context: async ({req, res}) => ({
        user: jwtValidationMiddleware(req?.headers?.authorization as string),
    }),
    listen: {port: 4000}
})
    .then(({url}: any) => {
        console.log(`🚀 Server listening at: ${url}`);

        // connect the mongodb database
        // Database url from atlas cloud
        const DATABASE_URL: string = `mongodb+srv://gauravbytes:Zah5jnclaMXbzANl@gauravbytes.buvimdx.mongodb.net/?retryWrites=true&w=majority`
        mongoose.connect(DATABASE_URL)
            .then(() => {
                console.log('Database connected successfully')
            })
            .catch((e: any) => {
                console.log('Error connecting : ', e?.message)
            })
    });
Testing
Step 1: Try to fetch posts of the user without any jwt token passed, it should throw an error
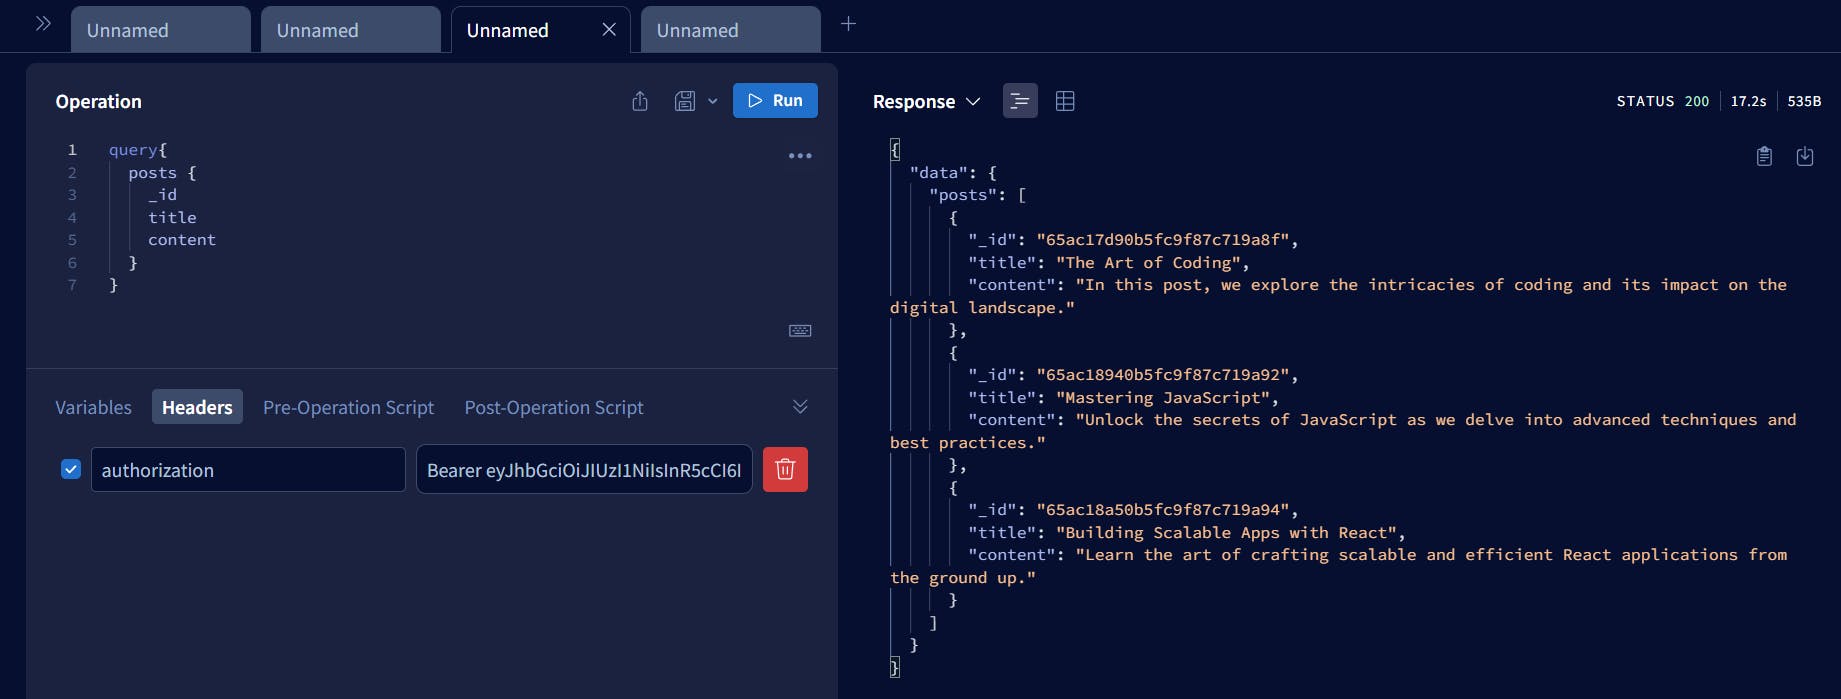
Step 2: Generate a new JWT token via login mutation
Step 3: Use the token and pass this token as a Bearer header and try to fetch posts, this time it should give lists of posts.
Congratulations, we have successfully implemented JWT authentication in Graphql API and it's working.